
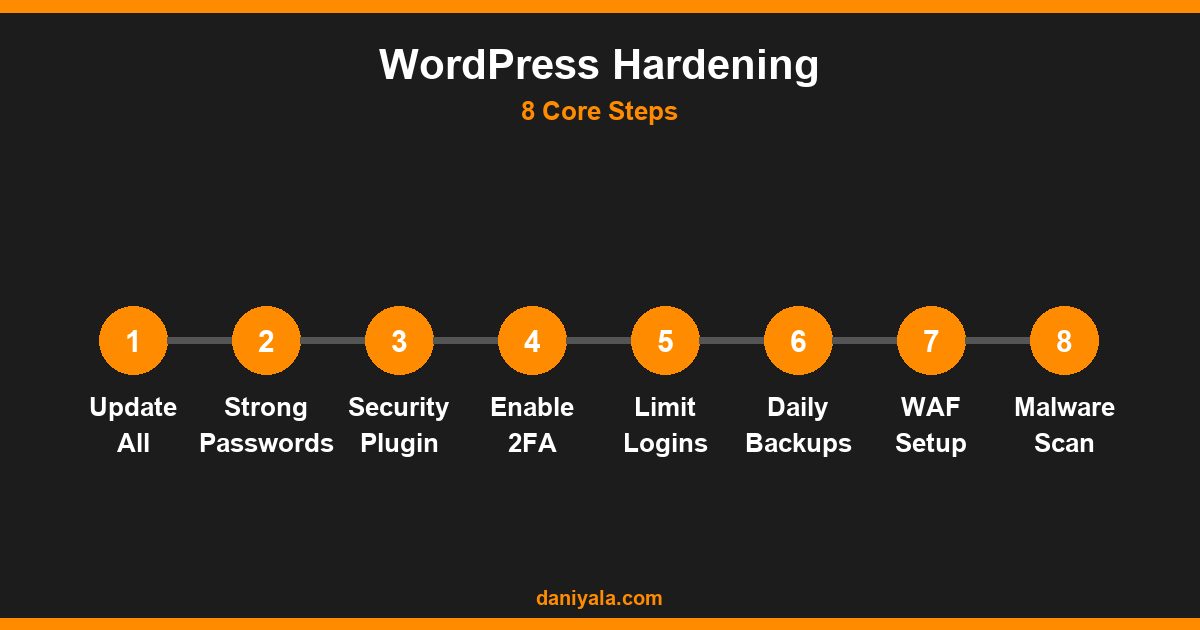
This guide covers WordPress security step by step — twelve concrete tasks that move a vulnerable site to a properly hardened one. I run through this checklist for every WordPress site I take on, whether it’s a fresh build or a recovery after a compromise. Most of it takes an afternoon; some items configure once and then run themselves. By the end, you’ll have covered the most common attack vectors that automated tools and real attackers actually exploit.
Table of Contents
- Step 1 — Keep WordPress Core, Themes, and Plugins Updated
- Step 2 — Use Strong, Unique Passwords and a Password Manager
- Step 3 — Install a WordPress Security Plugin
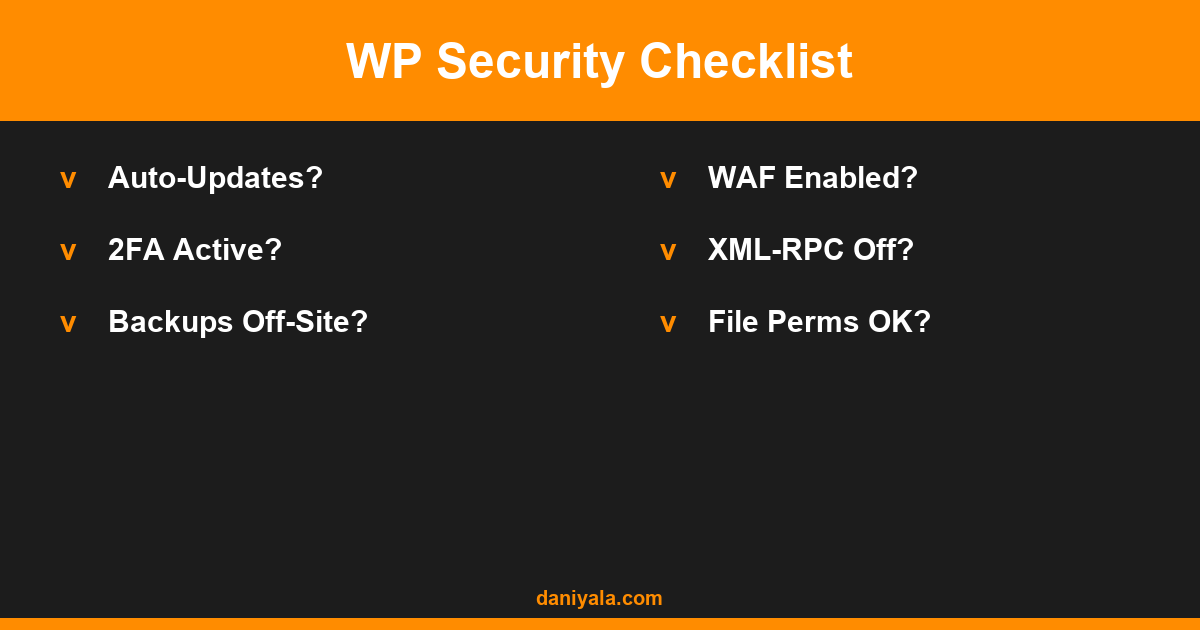
- Step 4 — Enable Two-Factor Authentication on Admin Accounts
- Step 5 — Limit Login Attempts and Protect wp-login.php
- Step 6 — Set Up Automatic Daily Backups
- Step 7 — Configure a Firewall and Block Bad Bots
- Step 8 — Run Weekly Malware Scans
- Additional Hardening Checks
- Frequently Asked Questions
Step 1 — Keep WordPress Core, Themes, and Plugins Updated
Outdated software is the single largest source of WordPress breaches. When a plugin vulnerability is publicly disclosed, working exploits appear within hours. An unpatched site is a visible target in automated scans that run constantly across the web.
Enable automatic updates for WordPress minor releases via Settings → Updates. For plugins, enable auto-updates for stable, actively maintained plugins — or check and apply updates at least weekly. Delete any plugin or theme you’re not actively using. Even deactivated-but-installed plugins sit in the file system and can be exploited through known vulnerabilities in their code.
Step 2 — Use Strong, Unique Passwords and a Password Manager
Brute force and credential stuffing attacks target weak admin passwords. Common passwords are in every wordlist that automated attack tools use by default.
- Use a randomly generated password of 20+ characters for every WordPress admin account.
- Every admin and editor user on the site needs a unique, strong password — shared credentials mean one compromised account opens everything.
- Use a password manager (Bitwarden is free and open-source; 1Password is strong for teams) so password complexity isn’t a daily burden.
- Change your database password if it’s using a default or simple value from initial setup.
Step 3 — Install a WordPress Security Plugin
A good security plugin provides a firewall, login protection, file integrity monitoring, and malware scanning in one package. My standard recommendation is Wordfence Security (the free tier covers everything a small site needs) or Solid Security (formerly iThemes Security).
After installing Wordfence:
- Run the initial security scan — it checks your files against official WordPress.org checksums and flags any unexpected modifications.
- Enable the Web Application Firewall and set it to “Extended Protection” mode.
- Turn on live traffic monitoring to see what bots and vulnerability scanners are hitting your site in real time.
- Configure email alerts for admin account changes, plugin installations, and spikes in failed login attempts.
The official plugin directory at wordpress.org/plugins lets you verify active install counts and recent update dates before choosing any security plugin. Look for plugins with 1 million+ active installs and updates within the last 30 days.
For the architectural reasoning behind each of these choices, our comprehensive WordPress security guide covers the full hardening framework including hosting-level considerations.
Step 4 — Enable Two-Factor Authentication on Admin Accounts
Even with strong passwords, 2FA adds a second barrier that stops credential-stuffing attacks reliably. If your admin password is compromised in a data breach from another service, 2FA on your WordPress login prevents the attacker from using it.
Wordfence includes 2FA for free under Users → Profile. Alternatively, the Two Factor plugin from the official WordPress security team is a minimal, well-audited option. Configure it for every admin and editor account — not just the primary admin. A compromised editor account that can install plugins is as dangerous as an admin account.
Step 5 — Limit Login Attempts and Protect wp-login.php
By default, WordPress allows unlimited login attempts. Automated attack tools exploit this with tens of thousands of password guesses per hour without triggering any rate limit.
Limit login attempts
Most security plugins include this setting. Configure 3–5 failed attempts before a temporary lockout, and log persistent offenders for permanent IP blocks. Wordfence’s brute force protection handles this automatically once enabled.
Relocate or protect the login URL
Some security plugins let you change the login URL from /wp-login.php to a custom path (e.g. /secure-login-xyz). This eliminates a significant share of automated login attacks because the bots don’t know where to send requests. Alternatively, add HTTP authentication at the server level to protect the /wp-admin/ directory — this requires a username and password before even reaching the WordPress login screen.
Step 6 — Set Up Automatic Daily Backups
Backups aren’t prevention — they’re your recovery plan when something goes wrong. And something will go wrong eventually. Plugin conflicts, bad updates, and compromises all happen to well-managed sites.
- UpdraftPlus (free) handles both database and file backups on a schedule. Set database backups to daily and file backups to weekly for most sites.
- Store backups off-site — Google Drive, Amazon S3, or Dropbox. A backup stored only on your server is lost if the server is compromised or the hosting account is terminated.
- Test a restore at least once every few months. A backup you’ve never tested is a backup of unknown reliability.
Step 7 — Configure a Firewall and Block Bad Bots
A web application firewall (WAF) sits in front of your site and filters malicious traffic before it reaches WordPress. Wordfence’s WAF does this at the application level. For stronger protection, a DNS-level firewall like Cloudflare’s free plan blocks attacks before they reach your server entirely — reducing server load and protecting against distributed attacks that application-level firewalls may struggle with at volume.
Bad bot traffic — vulnerability scanners, content scrapers, credential stuffers — can consume server resources significantly and inflate analytics numbers. Cloudflare’s bot management or your security plugin’s IP blocklist both reduce this load without affecting real visitors.
Step 8 — Run Weekly Malware Scans
Even with all previous steps in place, a regular scan confirms nothing has slipped through. Wordfence’s malware scanner checks your files against known WordPress checksums and flags any modifications to core, plugin, or theme files.
Schedule scans to run automatically at a low-traffic time — 3am on a weekend is typical. If a scan finds a modified core file, restore it from a clean backup rather than patching the individual file — a patched file may still contain injected code in other locations.
For context on what Google considers when evaluating site safety, their Safe Browsing documentation is worth reading — a site flagged for malware receives a browser interstitial warning that drops traffic to near zero within 24 hours of flagging.
Additional Hardening Checks
With the eight core steps complete, run through these additional hardening items:
Enforce HTTPS sitewide
Install an SSL certificate (free via Let’s Encrypt through your host) and redirect all HTTP traffic to HTTPS. Set this in your security plugin settings or via a server-level redirect rule. HTTPS is both a confirmed Google ranking factor and a prerequisite for browser security indicators.
Set correct file permissions
Directories should be 755, files should be 644, and wp-config.php should be 600 or 440. Overly permissive permissions (777 on directories) allow any server process to write to your files — a common vector for malware injection on shared hosting environments.
Change the database table prefix
WordPress uses “wp_” as the default database table prefix. Some SQL injection attacks target this prefix directly. For new sites, change it during setup. For existing sites, your security plugin can assist — but create a full backup and test thoroughly before making this change.
Disable XML-RPC if unused
XML-RPC is a remote publishing API that has been a persistent attack vector in WordPress. Unless you use a service that requires it (JetPack, certain mobile apps), disable it entirely via your security plugin. Most sites have no need for it.
Remove the admin username
If your primary admin account uses the username “admin,” change it. Brute force tools try “admin” as the username in every attack because it’s the WordPress default. Create a new admin account with a unique username, transfer content, and delete the old “admin” account.
Once you’ve worked through this full checklist, our WordPress security tips roundup covers additional platform-specific recommendations that go beyond the core hardening steps. And if you want to verify the overall technical health of your site after completing these steps, our technical SEO checklist covers the overlapping areas where security and search performance intersect.
Frequently Asked Questions
How long does it take to secure a WordPress site step by step?
For a reasonably healthy site, working through all the steps in this guide takes 3–5 hours. Most of the time goes into installing and configuring a security plugin, setting up off-site backups, and running the initial scan. After the initial setup, ongoing maintenance is largely automated — weekly scans and update checks take under 30 minutes per month.
What is the most common cause of WordPress hacks?
Outdated plugins and themes account for the largest share of WordPress compromises. Attackers scan the web for sites running known vulnerable plugin versions and exploit them at scale with automated tools. Keeping everything updated and deleting unused plugins eliminates this attack vector almost entirely.
Is a security plugin enough to fully protect WordPress?
A security plugin is essential but not sufficient on its own. It covers the application layer — login protection, file scanning, firewall rules. You still need strong passwords, 2FA, off-site backups, and a hosting provider with server-level security including malware scanning, DDoS protection, and file system isolation between accounts.
Does WordPress security affect SEO?
Directly, yes. Google’s Safe Browsing service flags sites hosting malware or participating in phishing — a flagged site receives a browser warning that drops organic traffic to near zero. A hacked site can also inject spam links into your content that trigger manual ranking penalties. Security and search performance are not separate concerns for a WordPress site.
Should I use managed WordPress hosting for better security?
Managed WordPress hosts (WP Engine, Kinsta, Cloudways) include server-level malware scanning, automatic daily backups, and WAF rules as part of the plan. For high-traffic or business-critical sites, the cost premium is usually justified. For smaller sites, a quality shared host with cPanel and the steps in this guide is adequate protection.
Need help implementing this? I’m Daniyal — freelance SEO & WordPress expert. Contact me or find me on Upwork.





 by Daniyal © 2026 All Rights Reserved